domingo, 28 de agosto de 2011

Main Feet

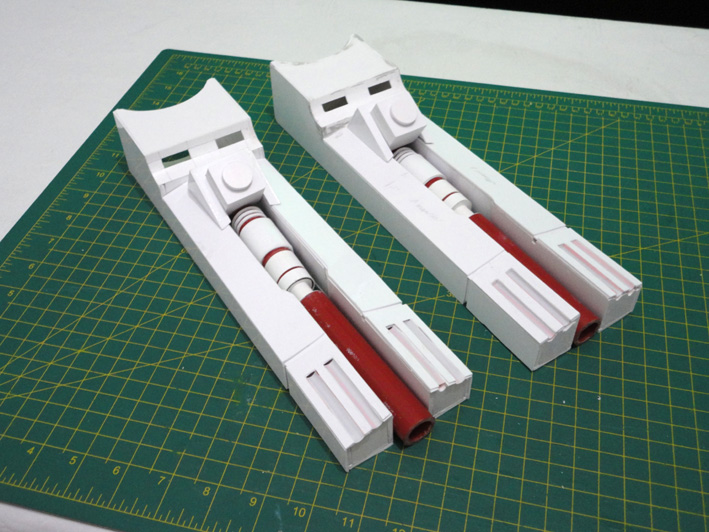
El fin de semana lo dediqué al armado de los pies, los hice en madera MDF de 3mm ya que me había quedado sin plancha de estireno. Dibujé las partes de acuerdo a los blueprints. Los pegué con adhesivo vinílico para madera y ajusté con cinta durante la noche.


Además le hice un marco cuadrado para pegar adentro, y así hacer más fuerte el pie. Luego pienso cubrir la madera con estireno de 0.5mm. Cometí el error de copiar las medidas de las maderas con estireno antes de armar el pie, por lo que esta piel blanca me quedó corta en los bordes. De todas maneras lo hice para un pie, para el próximo lo haré correctamente!!


Update: 9/10/2011

Luego de un tiempo sin publicar (aunque estuve construyendo partes todo este tiempo) pero por falta de tiempo no pude subir nada, acá van las entradas y actualizaciones.

Sigo construyendo los pies principales, les agregué la parte inferior e interior. Ahora falta hacer el "drive train" de Senna el cual haré en MDF reforzado con varias capas.


Motores!

A partir de ahora escribiré el blog en español, me cansé del inglés, suficiente tengo ya con el trabajo!

Estuve de vacaciones por eso no escribí durante un tiempo. Hace 2 semanas recibí los motores para los pies (NPC2212) y el Dome (Pittman). Gracias a mi amigo Cuatro que me envió los mismos desde USA ya que Pittman no envía fuera de USA.


lunes, 1 de agosto de 2011

Power Distribution Board

Today I received the Power Distribution Board 12 volt version, a great run from Dan Stuettgen! This will allow to distribute power of different sources (6v, 12v, 24v, etc).

sábado, 30 de julio de 2011

Frame!!

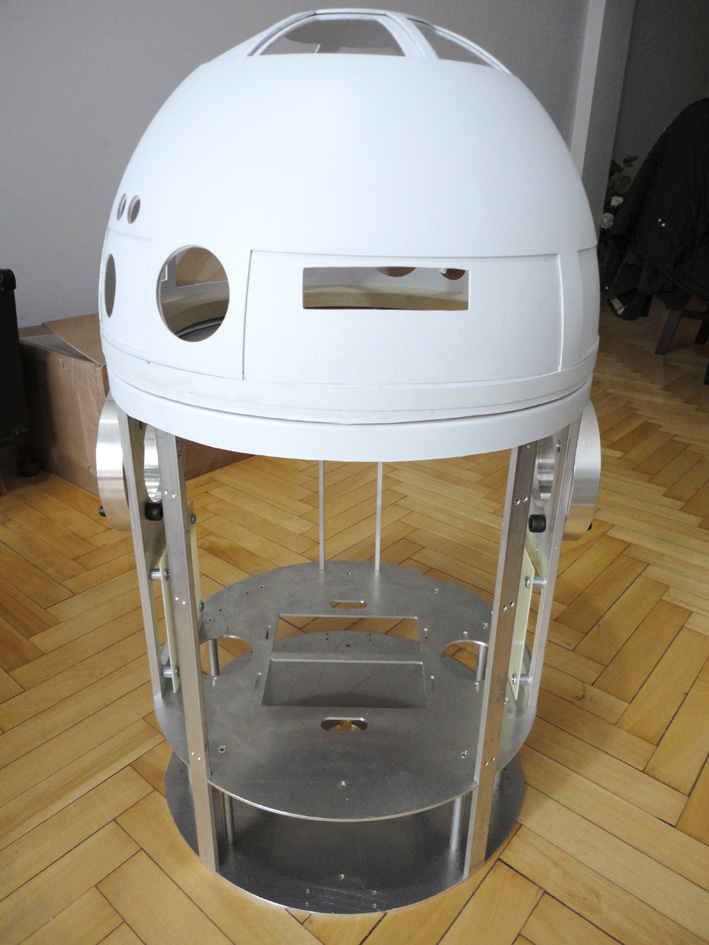
Yesterday I went to Customs to picked up the COM 8B frame :-D. Today saturday I assembled everything, and now the project is turning into a real thing!! It was very easy to assembled, first I sanded and washed all parts and then followed the instructions that came in the box. I also looked different pictures to see if I was going on the correct way.

Next step is finishing legs and center ankle. After that finishing the Dome so I can start later on electronics. In the meanwhile I'll be painting styrene parts.


miércoles, 13 de julio de 2011

Arduino Kit arrived!

Arduino starter KIT arrived safety. I will use this to build FLD and RLD.

Drivers arrived!!

I received the Sabertooth 2x25 and Syren 10 drives. The first one is for main feet and the second one is for the Dome.

miércoles, 6 de julio de 2011

RLD and FLD Boards arrived!

I also received from Laen the PCB to build the Front and Rear Logic displays. I will follow this tutorial.
And received the MAX7219 Led Display Driver as well.

MDF Inner ring

Yesterday I bought a circular MDF 46x18mm to make the inner dome ring. I sanded it about 3/4mm and then cut out the center to fit the bottom dome ring. After that, I presented the inner dome ring and put the outer dome and Dome Base Plate, here it made a mistake trying to force the Dome ring and broke the thin strip below the RLD. I will need to glue it once everything is done.

During the weekend I will drill the Inner Dome Ring and try to fit everything before I receive the body frame.


12 Channel RF Remote arrived

Today I received the 12 Channel Wireless RF Radio Remote Control System. I will use this for Sounds along with the Arduino and CFIII Sound.

Center Foot

I've been working on the Center Foot. I made it of styrene 3mm, put an MDF frame inside to tight it up and make it stronger, and glued 3mm strips inside as a frame as well. Next step is to finish the details.


lunes, 27 de junio de 2011

Dome Base Plate arrived

Today I went to pick up at UPS the Dome Base Plate!!! This is a JAG's run made in aluminum. I also drilled the holes in the rockler bearing to fit the base plate. Next step is to build the brackets for the Pittman motor and sand again the rockler bearing.

miércoles, 22 de junio de 2011

Resin parts arrived!

Today I received a few resin parts from Steele. These are Shoulder Hubs, Shoulder Hydraulics, Shoulder Buttons, Knurled Hose Fittings, Front and Rear Logic Display boxes.
They need to be sand and drilled before painting. They fit perfectly.

lunes, 20 de junio de 2011

Ankle Details

Today I finished the Ankle Details, made them in styrene of the pdf downloaded from astromech.net. I used 3mm and 1mm styrene and filler for the little gaps. There were pretty easy and faster to make. I did the top squares a few days ago gluing 6 layers of 1mm styrene and sand them to obtain the curves on the sides.


domingo, 12 de junio de 2011

Logic Bezels

Today I also received from Joymonkey the Logic Bezels, they are superb. I can't wait to start working on Logic Displays.

Second Booster Cover

Ok, today I decided to make the second Booster Cover, but this time I glued with the correct liquid and I finished really faster and easy. Despite I made one before, I made a little mistake when I cut the upper layer thinking that it was too wide, but when I glued all parts I realized that it was wider to fit all parts together (it can be seen in the inner medium part), but I will fix it later with filler before painting.